I have recently learned about the fantastic concept of sensory boxes. These are portable boxes filled with all sorts of random things that help babies and toddlers learn about colors, shapes, textures and other random details about the world around them.
 A great way to introduce the sensory box is essentially by building an indoor sandbox. As we are still living in Alaska until November before we move back to Texas, anything we can do indoors is a bonus!
There are many things you can use as the sand. I am starting with Rainbow Rice! Across Pinterest (and the rest of the internet, I'm assuming ha) there are various ways to make this rice. The instructions below are my version, as I wanted to make sure that should any of this rice make its way into the baby's mouth, it would not be toxic.
Items you will need:
- several bags of white rice (I used 8 bags which turned out to be plenty. Oh, by the way, I actually bought 4 bags of brown rice first, thinking if I never got to the project that at least I could cook with the rice since I prefer brown. Then I bought 4 white bags. The white definitely allows the colors to be brighter, but the brown does take the color differently so you have more color options.)
- food coloring (I used the gels)
- dark-colored mixing bowl (just in case!)
- spoon
- water
- baking sheets
- paper towels
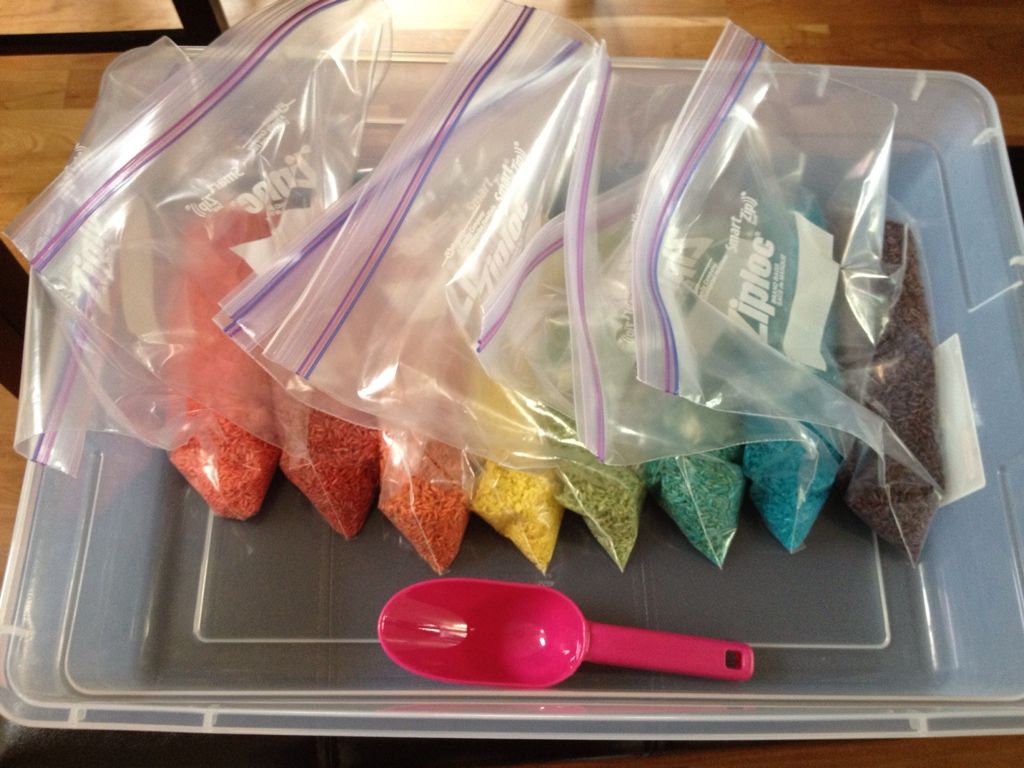
- ziplock bags for storage (I used one per color)
Instructions:
- Add several drops of one color to your mixing bowl. Add about 4 Tablespoons of water and mix well with your spoon. The more color you use the brighter/darker the rice will be, so feel free to experiment.
- Once the color is mixed to your satisfaction, add a bag of rice. Mix thoroughly until the color is evenly distributed and all the rice has been colored.
- Lay a paper towel down on a baking sheet. Pour the rice onto the paper towel and use the spoon to spread it as flat as possible to dry. Drying time is pretty quick - I let each color sit for about 20-30 minutes. Your rice might get hard and crunchy, and even stick as it dries. Just use your spoon to break it up again.
- Once the rice is dry, pour into a ziplock bag to store/transport. You might need some extra hands to keep the rice from getting everywhere as you pour (I used a big pot and sat the bag in it.)
- Repeat with the rest of your rice until you have the amount you want.
- Use your rice! This stuff is great for sensory boxes, arts & craft projects - you can even just eat* it to make for a fun meal! Have fun!
*If you are planning to eat this rice, please use my instructions versus some other web recipes. I have seen some direct you to use rubbing alcohol when coloring the rice and that is obviously dangerous to consume!
And as a final comment, I saw that rice hit the news today as having trace amounts of arsenic in most brands, which is obviously not good. Authorities are recommending that everyone limit feeding their babies rice to one time a week. One more reason to avoid eating it and instead use it for crafts!
No comments:
Post a Comment