Wednesday, September 11, 2013

Why I Craft

Do you remember those random tests you took throughout high school to try to help you decide on the career you were destined for? I remember taking the one that told you if you were left-brained (logical, analytical) or right-brained (creative, musical). Well, I scored smack in the middle.

I am an engineer, which satisfied my left-brained-ness (my what?), but maybe because I spent so much of my education on that side, my creative side is always bursting to get out. I have found that even as an adult, I am in need of a creative outlet on an almost-daily basis. I typically have at least 2-3 projects on my plate to keep my right brain stimulated and satisfied. And being a mom is the perfect way to justify this need.

So, why do we craft? There are probably MILLIONS of crafty blogs out on the internet now. Apparently a lot of people feel like me for one reason or another. Here are MY reasons:

1.) It's cost efficient. This is where it began after I started living on my own after college and wanted to find a way to decorate on a budget. I started with sewing everything from clothes to curtains, creating my own holiday decorations, etc. It was fun to put my personal touch on things.

2.) I know what I want. I'm that girl who can speed shop through a department store because I know exactly the style and color of the item I am looking for, so I can quickly find it if it is there (or not). I took this to a new level with my wedding. Sure, I wanted to save money (and weddings are ex. pen.sive.), but in the end, I got exactly what I wanted, and I know if I had to pay for what I ended up with, the costs would have been seriously elevated. Here are some things I designed and made all by myself for the Big Day (and if you've been through planning a wedding, you know how big of a deal it is to add this to the planning plate):
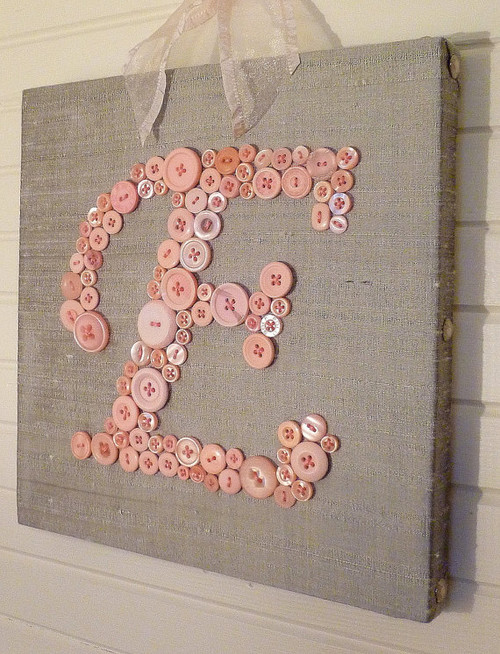
I might have gone overboard, but I loved doing it all! From the top left, my custom designs included water bottle labels, sand dollar seating "card" magnets, family seating signs, menus, flip-flop favor labels, monogrammed centerpieces, (more) water bottle labels, ceremony programs, and favor tins with labels. 
These items went into the hotel bags. I designed Welcome Cards, bottle labels (those AREN'T regular Coke/DC labels!), and snack bag labels.
And if I did all that other stuff, you have to assume I did the invitations. Everything from the Directions card to the stamps.
3.) It's therapeutic. I often hear about Knitters. You know who you are. I might get there someday, but for now, my relaxation is in my crafting. A paintbrush, a glue gun, GLITTER...these things totally hit my Happy.

And lately, I have a FOURTH reason!

4.) Holy Canada. Now that we are living in Canada, if I get a decor idea in my head and I even ponder the thought of just buying it from somewhere, it pretty much has to come from the States as just about everything is imported up here. Which means so much more money is wasted on shipping, customs fees, taxes...not to mention it takes a riDICulous amount of time to ship anything here, assuming one of the few delivery services deliver the package to the right house (we've already had a LOT of issues after just being here two months). So the next best thing? MAKE IT!!!

What's your reason?

Saturday, September 7, 2013

We Made it to One Year!

Patiently waiting for her party to begin. And yes,
of course I made her a tutu.  You can't resist
these things when you have a little girl,
no matter how much you think you will.
...well, I guess it's not like I thought we wouldn't make it to one year, but OH the year we had!!

And I hope you will forgive how long it has taken me to get to this post, but I wanted to make sure all the details were included (read: I had time to get the pictures off my slr).

Like all parents, I am confident that my kiddo is an overachiever so of course we had way more firsts during Year One than I ever expected, and what better way to commemorate all our learnings than with a fun birthday party.


Bugga's first initial decorated with a year's
worth of faces was hung over the main
food table.
Bugga was born in that wonky time period between holidays (well right behind Thanksgiving) so this adds a little wild card to who might be expected to attend birthday events between holiday travel, flu-season, and end-of-year budgeting.

The theme for this momentous event, was....wait for it..."Sydney is ONE!". I know, so far off topic. I saw a few fun ideas on Pinterest (of course) that got my brain churning, and it turned out to be a great way to incorporate all the fun pictures we had taken throughout her first year.


The food spread!
Cupcake "cake" decorated
with M&Ms in the shape
of a 1 (in case it isn't obvious).
We had the party at home, and I just made a handful of finger foods (including many that were toddler-friendly), barbecue sliders in the slow cooker, and a cupcake cake for the masses (seriously, we had a ton left over).

The biggest challenge was the "entertainment" for the party. It is not lost on me that a 1 year old could not care less what happens at her party as long as her basic needs are met (food and getting attention, of course). So I was torn as to what to have planned for the kids to "do" while the parents mingled and talked everything kiddo. Add to that the range of children's ages - we had 3-month-olds all the way up to 7 years. How the heck do you entertain this crowd? Off to Pinterest I went to find ideas.
I decorated with Bugga faces wearing party
hats all over the party space.


Bugga faces everywhere!
And we found the perfect one, and it was perfect for tasking my husband with so he could contribute to the party planning without getting caught up in the details he does NOT find enthralling. What was my solution? A cardboard maze! We still didn't have furniture in our dining room, so it was the perfect place to set up a giant cardboard monstrosity. And Mr. MOMba really got into it, adding skylights, and decorating with polka-dot duct tape and velvet curtains. And the kids loved it. Bugga loved it so much that we kept it in there for the next 6 months until we moved (yep, really slow to go after that dining room furniture, but I swear we will have some soon).

Anyway, enjoy some photos from the big event - maybe someone out there can use this for some planning inspiration! *OK, I really thought we had taken some photos of the cardboard tunnel setup, but I can't find them anywhere...I will update the 'ol blog with some pics should I ever dig them up. ** Update (10/6/2013): Found one!

She was very hesitant in giving her
cake a try. This is the before shot.
This is the after-shot! Not too
 much damage, actually.


Here's our "dining room" - you can see the cardboard tunnel
 around the back, with multiple doors, skylights, etc. - the kids loved it!

Friday, September 6, 2013

Magnetic Board Options

After my recent project creating Fabric Alphabet Magnets for my daughter, I of course needed to find a magnetic space for her to use her new magnets.

I saw this great idea on Pinterest to use an inexpensive oil drip pan that can be purchased for a low price at a local Home Depot or Lowe's. Perfect.

Except apparently in Canada they don't believe in these particular style of oil drip pans, so I hit a dead end immediately.

Then I thought, well, I'll just get a board cut to my specifications, and then use a couple various products on the market (specifically Chalk Board Paint and Magnetic Paint) and make my daughter her own customized chalkboard-magnet-board combo space. Genius.

Thankfully I did a little online researching before investing in any of the supplies needed. I found this and this which taught me two things: 1) There is a certain guy posting on every internet thread about his magnetic paint additive that is overall a pretty grouchy guy, and 2) Magnetic paint is a waste of time and energy.

OK so now what? I could buy a kid-specific magnetic board, but I really wanted something BIG and most kid magnetic boards I could find are somewhat teeny.

In the end, I went with a magnetic dry erase board (Michael's, ~$20). I will be no means be giving my 21-month-old dry erase markers anytime soon, but it works great as a clean magnetic space for her new magnets, and down the road she'll have fun with the markers.

Project: Fabric Alphabet Magnets

I just finished a very easy project that I'm already pretty proud of, as it turned out better than I expected- fabric alphabet magnets! Right now Bugga is 21 months old, and we are focusing on her learning her letters. This project was perfect. I found a couple links to blogs via Pinterest for some DIY magnet letters using felt and even to links on Etsy that were selling a similar style. I decided to use regular fabric for mine - see below for the directions!


Fabric Alphabet Magnets

What You Will Need:

  • Fabric that you like (I used part of a Hobby Lobby pack of whimsical quilting squares that I picked up a year ago with the primary intention to stuff them into a tissue box for Bugga to pull out over and over again. She still enjoys this; fortunately this project only used about a third of the fabric squares.)
  • Coordinating cross-stitch thread
  • Needle
  • Scissors
  • Quilt batting, cut into 1" strips, and then lengths relevant to your letter sizes (by some miracle I had some lying around from my one attempt at making a quilt)
  • Computer with a printer/paper
  • Magnets (I picked up a pack of 50 from Michael's)
  • Elmer's (or any basic) glue
  • Pencil
How to Make the Letters:
  1. Determine what you want your letters to look like by finding a font in any basic program (Word, Publisher, etc.). Size the letters in your software program so they are big enough for your liking, then print out each letter you would like to create. I did the entire alphabet, but you could also make numbers, extra vowels, etc. Tip: When thinking about what size you want your letters, consider the size of your magnets. Depending on where they are placed inside your fabric, the letters need to be big enough for the fabric to be sewn around them. Print all of the letters/numbers and cut out each one.
  2. Trace the letters using a pencil onto the back side of the fabric. You will need two of each letter/number to serve as the front and back. If your fabric is the same on both sides, then this is not as important. Mine was not, so I was careful to just leave pencil marks on what would serve as the inside of the letter. Tip: To save cutting time, and to help with lining everything up when you sew, you can fold the fabric in half and cut the fabric along the folded edge so you don't need to have two separate pieces.


  3. Lay out your fabric letters and divide the magnets up between each one. Because fabric is not as thick as felt, not as much magnetic strength is needed, so I used 1-2 magnets for each letter, depending on the size (I only used 1 magnet for letters like "I", "J" and "Y"). Use the glue to affix the magnets to the fabric letters, being careful to glue the magnets to the inside of the back piece of the fabric. Let the glue dry.
  4. Start sewing! I used half of each piece of cross-stitch thread (3 of the 6 pieces) to do my sewing. I found that I have zero skill in guestimating how long my thread should be for each letter, but due to how they are sewn, it doesn't matter if you run out and need to start up with new thread. As advised on the blog mentioned above, I also used the Blanket stitch, which worked great, and was very easy for me (and I don't sew all that much). Personally, if a letter had an inner area (like "A", "B", "R", etc.) I would stitch this first, which helped keep the two pieces of fabric aligned. I also stitched all the way around the letters for consistency, even if one of the edges was part of the original fold of the fabric.

  5. As each part of the letter being stitched is enclosed, use a pencil to stuff the strips of quilt batting inside the letter. Be careful to work around the magnets.
  6. That's it! Start the fun! For more info on the process I went through to decide on a magnetic board for these magnets, click here!

    Fabric Alphabet Magnets in Action!

Tuesday, September 3, 2013

Second Kid Stress

So here I am, trucking along into my 25th week of pregnancy with Baby #2. That puts us into viability range, which of course, is a nice relief of a milestone. In only a few short weeks I will be pushed over into the Third Trimester. I am starting to feel the stress of having two children creeping up on me.

I'm sure all toddler and newborn moments
 look like this, right? RIGHT?!?!
I know very well I won't be the first to do it, but I am spending more and more time lately trying to wrap my preggo-brain around the logistics of the first few days/weeks/months of my newborn's life while intermingled with my toddler's day-to-day needs. Looking back on my experiences with my first born, I think about how easy it was from my perspective now (go back and read some old posts and see how much I am rewriting history here) and if I was going to be a first-time mom again (which is impossible), I'd be SO. READY.

But that's not really the case here. As much as I know all to well how it works to have a baby, I know NOTHING about what it is like to have a baby AND A TODDLER. And my freakouts are getting a little bigger by the day.

Of course, we must plan for the hospital stay, and my toddler will not likely enjoy or understand that experience and is best left at home until the baby has arrived. This requires planning, especially since we have no family nearby, are new to our new country and therefore have a limited social network, and well, Bugga has never been away from both her parents at once for longer than an hour in her life. And though I "lucked out" last time by only being in labor during daylight hours, there's always that chance that I will need to call SOMEONE to high tail it over to the house at 2AM to watch my daughter as we go speeding off to Labor & Delivery.

Once we get home, then at least we will have a couple weeks of man-on-man coverage with both kids since my husband will be home (thanking my uterus for birthing babies during end-of-the-year holidays once again). But once I am left to my own parenting when he goes back to the office, I am trying to wrap my brain around how I will juggle two severely different nap schedules, nursing, and toddler entertainment and activities that will likely require getting out of the house. Did I mention I'll be doing this in the wintertime? In Canada? Yeah, think snow - lots and lots of snow. I'm not even going to entertain my husband's jokes about nursing outside.

What tiny advice I have obtained here and there is that baby #2 (and any baby after that, should we be crazy enough to go for more...uh....forget I typed that) will be required to be much more flexible then we ever gave baby #1 credit for. Gone will be the eerily quiet household when the baby is sleeping. Gone will be the peaceful nursing sessions in the dark in the glider. And a myriad of other things too, I'm sure.

I'm trying to collect more information on how to plan for the changes, but I'm still coming up short for my own comfort. I found an e-book (The ABC's of Baby #2) last night and devoured it at the gym today - helpful but brief. If anyone out there in internet land has any tips, or resources, I am ready!!!

Friday, August 23, 2013

Toddler Bedroom Inspiration

Since we have moved to Calgary, I now have a blank slate for both Bugga's room, and the nursery for Baby #2. I plan to document both, but I won't post the nursery details until the baby is here since my friends and family don't know the gender yet!

For Bugga's room, I want to incorporate some trendy patterns, and add in little themes here and there of things that she likes. Also, we are putting a lot of emphasis on learning the alphabet lately, so I wanted to add letter details throughout the design. 

The catches to the room:

  1. We are renting. We have permission to paint the rooms, but everything has to be within "reason". Ha.
  2. Bugga will be in this room from age 1.5 - 5.5, so the plus here is I don't have to think too far ahead and not make it too "young" since we'll move after that and have a whole new clean slate to work with.
As I'm putting things together, I will post any DIYs or progress. Until then, here are some design inspiration ideas!

Color Pallette:

A lilac/lavender color, with silver/gray and white as the neutral base. I might throw in another miscellaneous pop of something like baby pink or lime green depending on what the decor calls for.


Wall design:
 
I am currently obsessed with stripes. And the idea of the gray and white is a nice neutral that will be great with a pop of color on top of it. I also like the concept of a solid wall painted in the color of the darker stripe. Not sure if I have the patience to paint the stripes though, so I might go the decal route.

Wall decor/curtains:


Some obvious points to note: There will be chevron. This is definite. I need to put an alphabet somewhere around the top of the room, and/or in a frame. I love the chevron canvas idea with color pops on top that tie to the theme. I also love the silhouettes and need to find a way to fit those in - perhaps sticking to something Minnie Mouse or flower related (Bugga's faves). Oh and glitter. If I can incorporate glitter into this effort, this is something I must do.

Furniture/Accessories:


I will need to transition Bugga to a "big kid bed" before the baby arrives in December to prevent the need for two cribs. This is currently freaking me out because a) she sleeps pretty darn well in her crib so why mess with something that isn't broken, and b) a big kid bed means she is growing up and I'm just not ready for this! I would love to get her a beautiful white canopy bed but I'm not sure her teeny 11'x11' room will allow for this. But I'll try to keep inspired by the concept at least. A trundle bed would be great too, then if we have problems with the twin bed transition, and a toddler rail doesn't work (crossing fingers once we get there), then a lower trundle mattress might prevent too many major crashes. And it would be good for sleepovers down the road.

I found the link above for a DIY rag rug that I think would look beautiful in Bugga's room. In fact, I've already started it with lavender, silver, and white satin fabric. The thing is, I'm pretty sure this project is going to take the rest. of. my. life. No joke.

I would love a reading nook/area in her room if there is space, but not sure it will happen. Oh, and the Minnie Mouse sheet options out in the world are for the most part pretty tacky, but a set of these sheets or something similar (subtle-style) would be a nice surprise under a purple comforter. We'll see if I can track any down as these appear to be previous year's style.

And the design process is ON! Please check back as I post progress!


Toddler Oatmeal Variation with Warning

A short while ago I posted a recipe for Toddler Crockpot Oatmeal. (You can find the recipe here.) Since we are now living in a colder climate, our mornings are chillier than the steamy Houston mornings. So obviously, oatmeal is a nice fixture to my morning. And being pregnant, this kind of breakfast is also an easy way to get a healthy protein with plenty of fruit into my body before the day barely gets started.

Being a crockpot recipe, I take literally 5 minutes to toss everything into my slow cooker right before I go to bed, and the house smells amazing by the time we wake up.

If you try this recipe around your mini-mes, I feel like I have to warn you. If I straight up ask my toddler what she wants for breakfast, everyday, without fail, she shouts, "WAFFLES!!!" (I have been feeding her the natural organic brand - the one with Cookie Monster on the box - from Whole Foods and she devours one each day. Unfortunately, the best I can do is the boring natural wholegrain style, as the organic version with blueberries are nowhere to be found up here (get with it Canada!)...anyway.) On mornings I know we have oatmeal, I offer some to her, and always get an immediate, "No." Fine by me. Now I don't have to share. Or so I think.

Without a doubt, the second I get an oatmeal-laden spoon into my mouth, Bugga is all over me with her "Bite, bite, bite!" chant. And then proceeds to eat at least half my bowl, waffle long forgotten.

It's good for her so I really am not complaining - but sometimes a pregnant mommy wants to eat all her breakfast too!

Don't say I didn't warn you!

My latest version of this recipe, adding a LOT of blueberries and sliced bananas. Yum!